To all our readers: Glædelig jul! (Merry Christmas!)
What you’ll need:
- a saks (pair of scissors)
- four papirstrimler (strips of paper), about 1 cm broad and 30 cm long
- a string (to hang it)
How to do it:
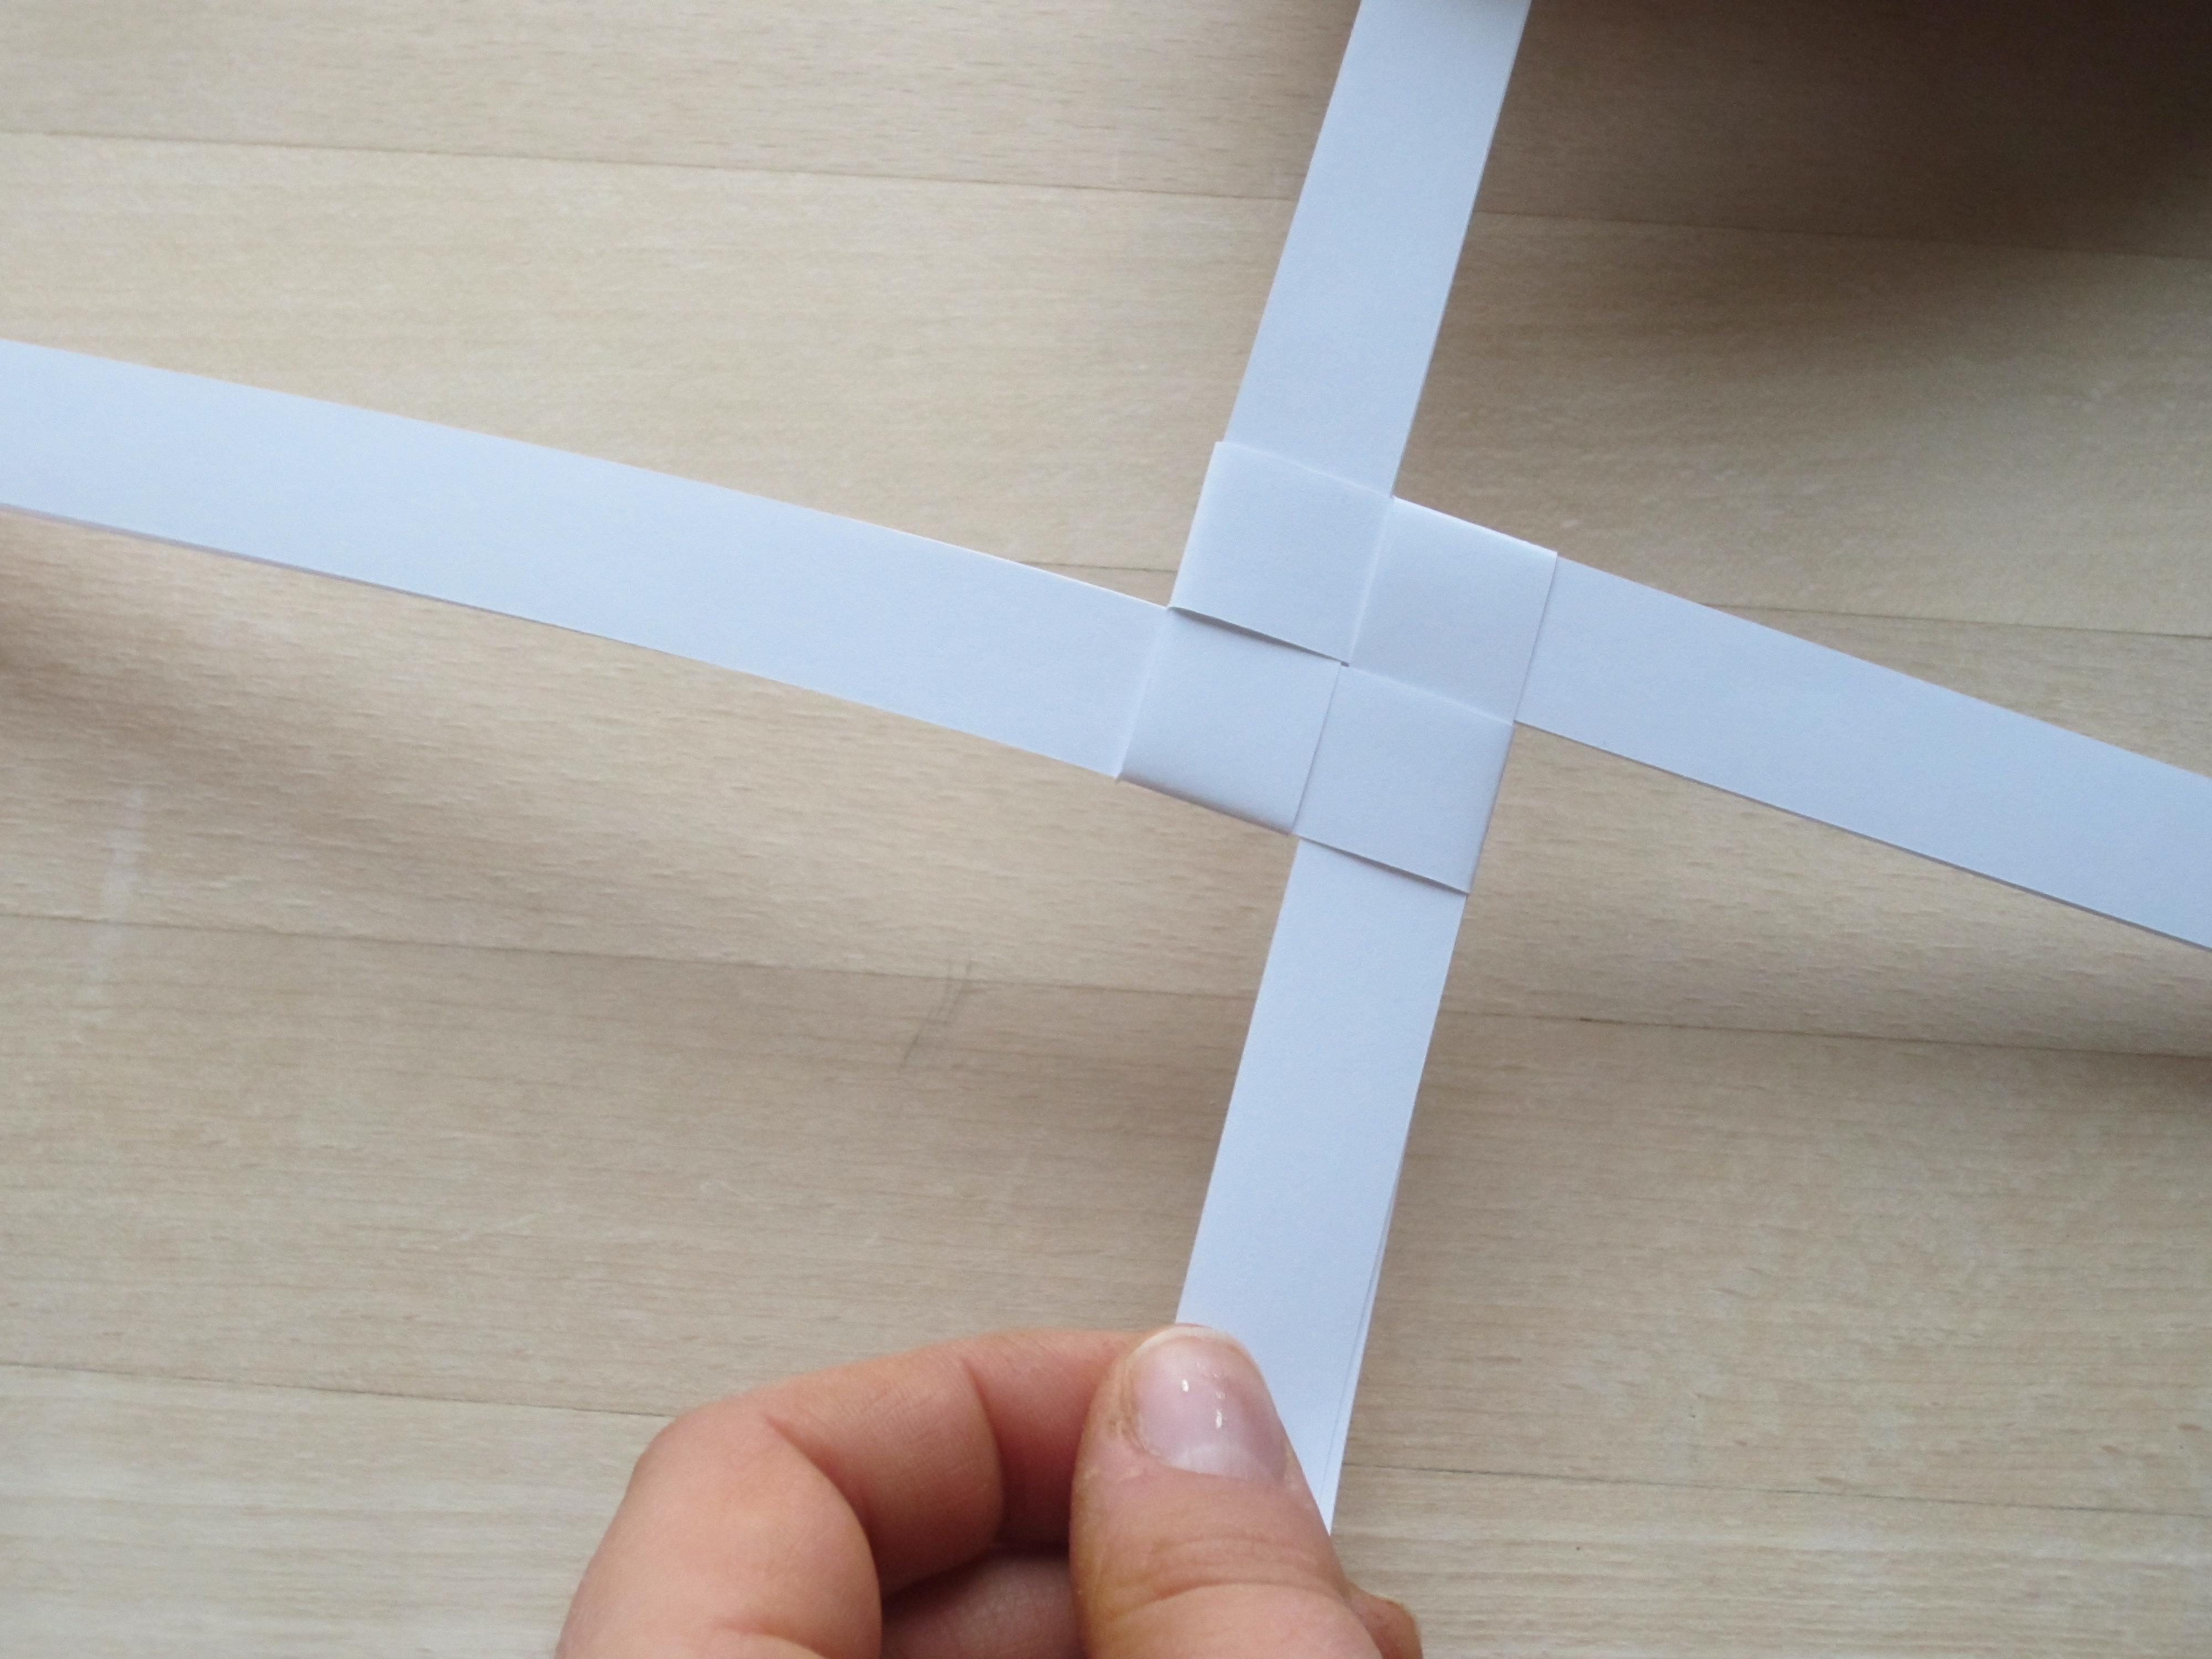
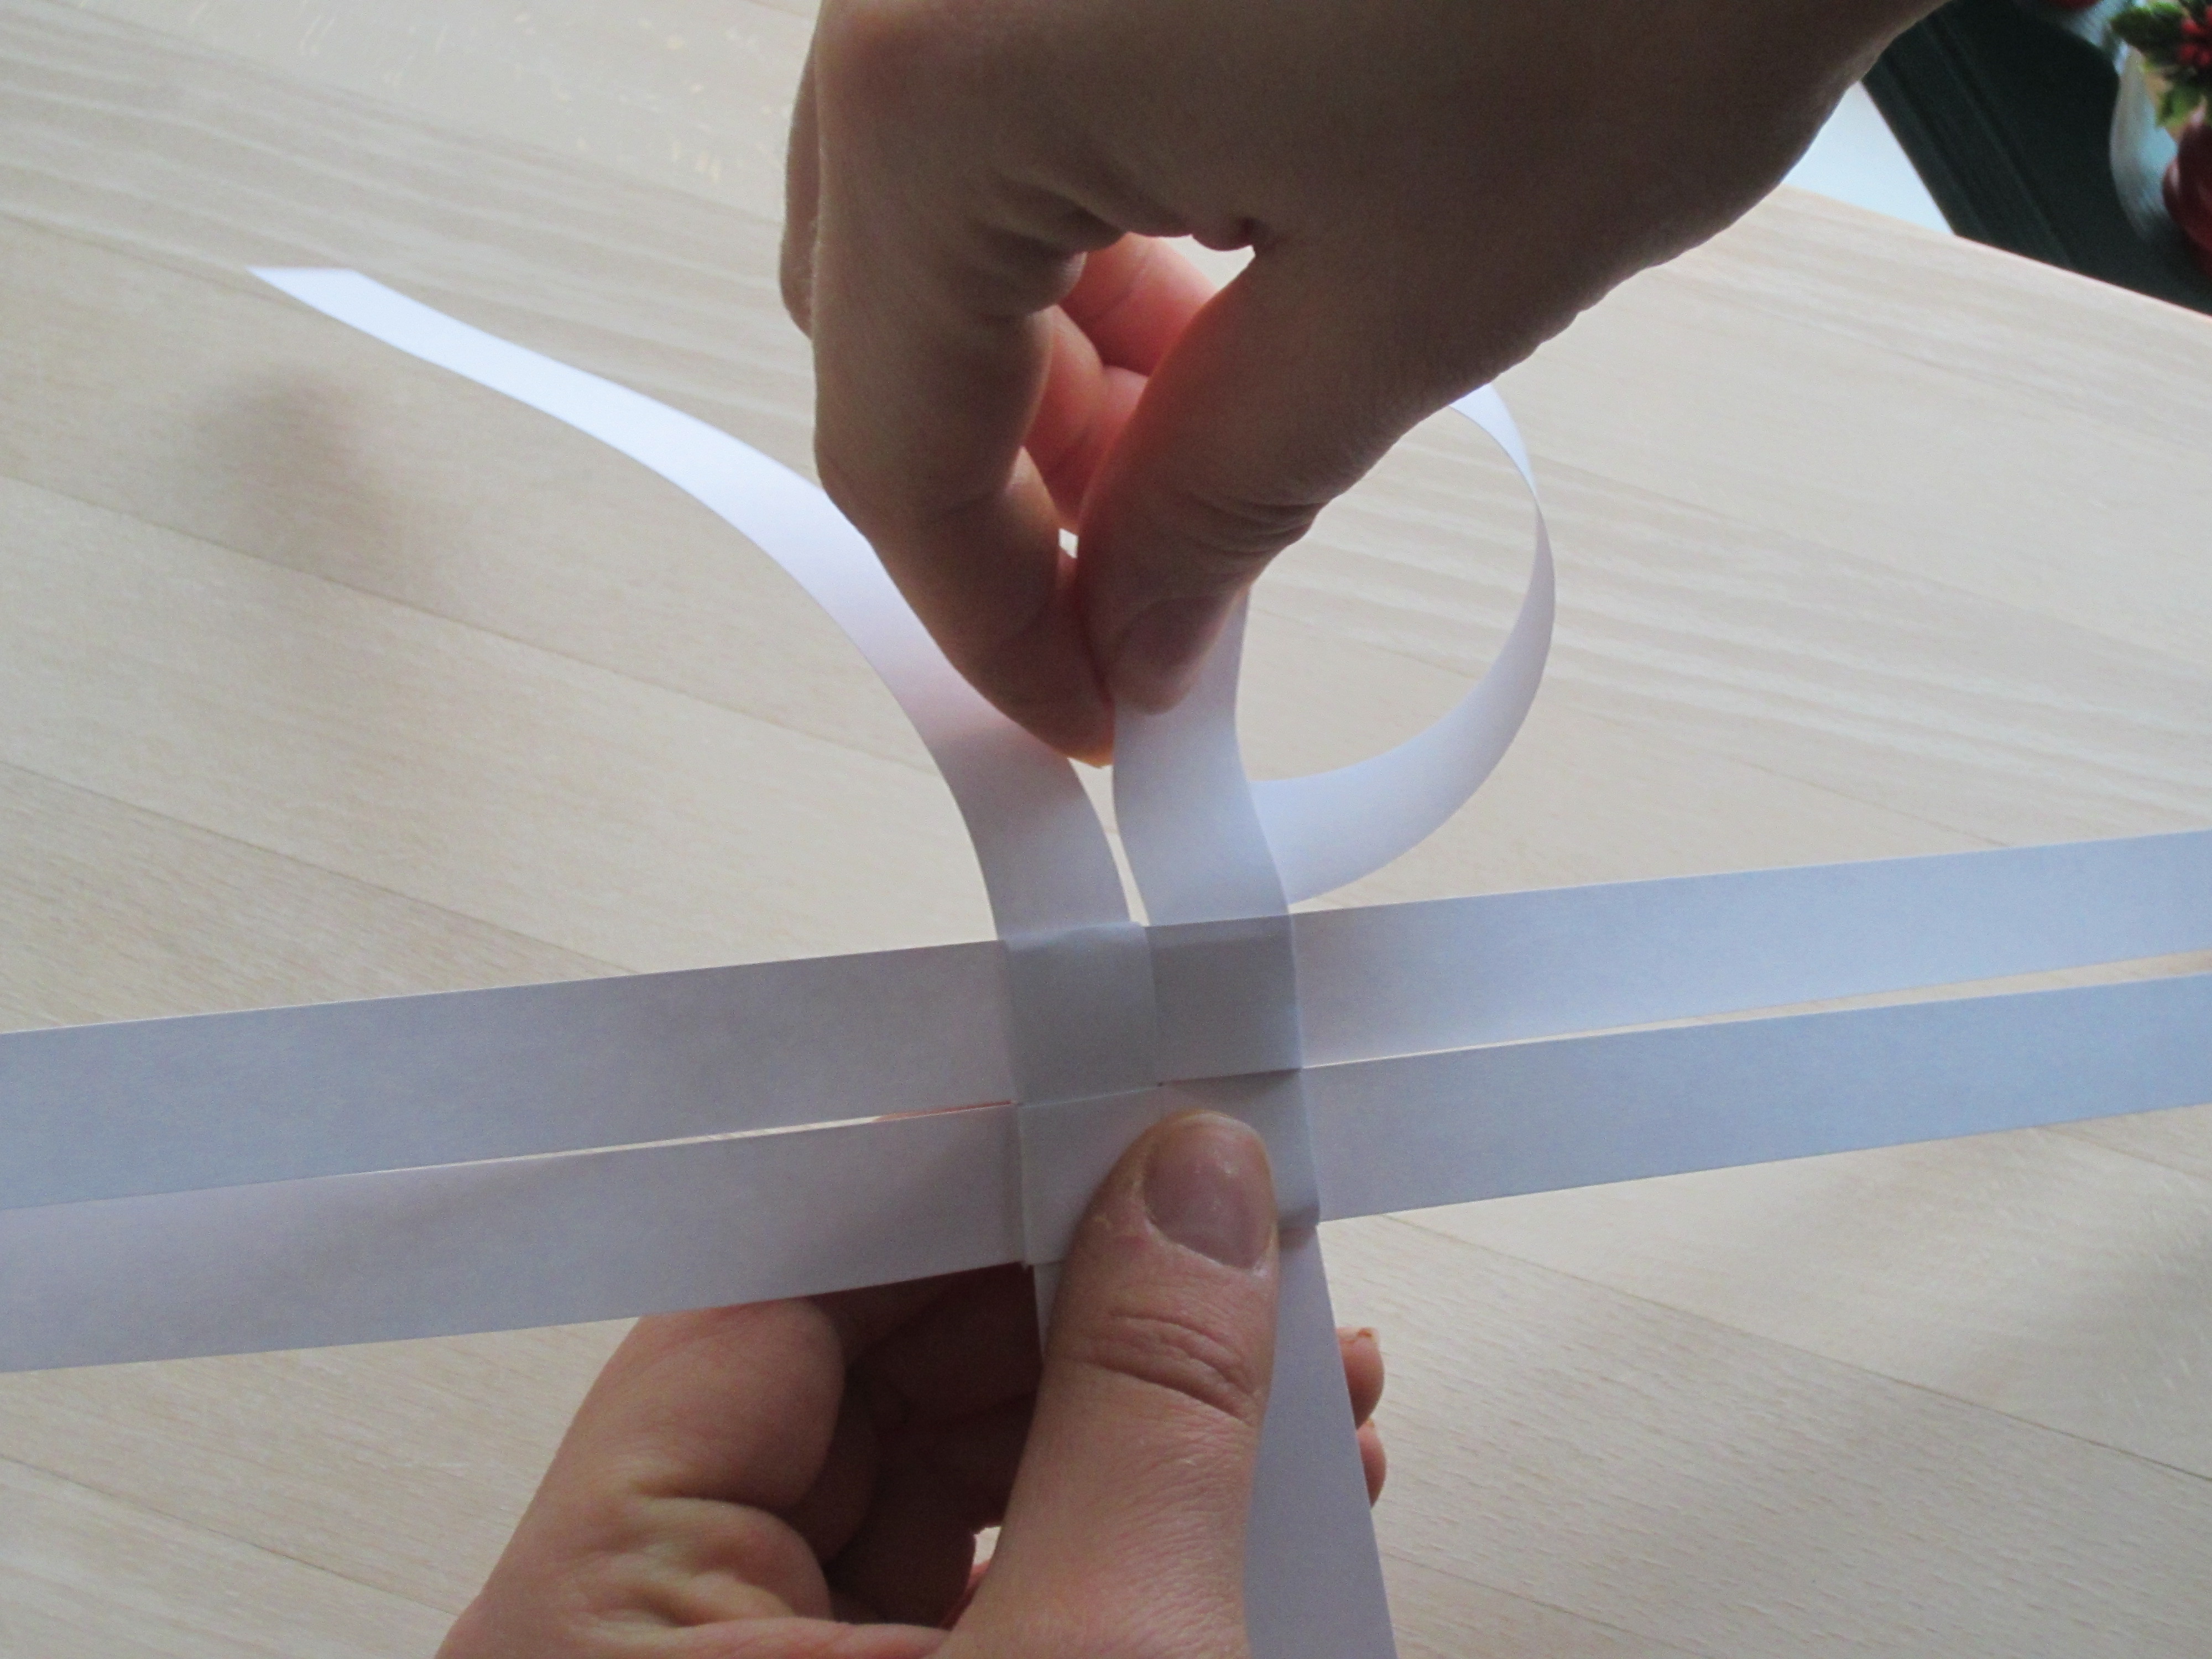
1. Fold each strip in the exact middle (so that it closes like a book).
2. Braid all four strips so that the folded ends ”lock” each other in a cross (strip-inside-strip, strip-inside-strip… Pull, pull…)
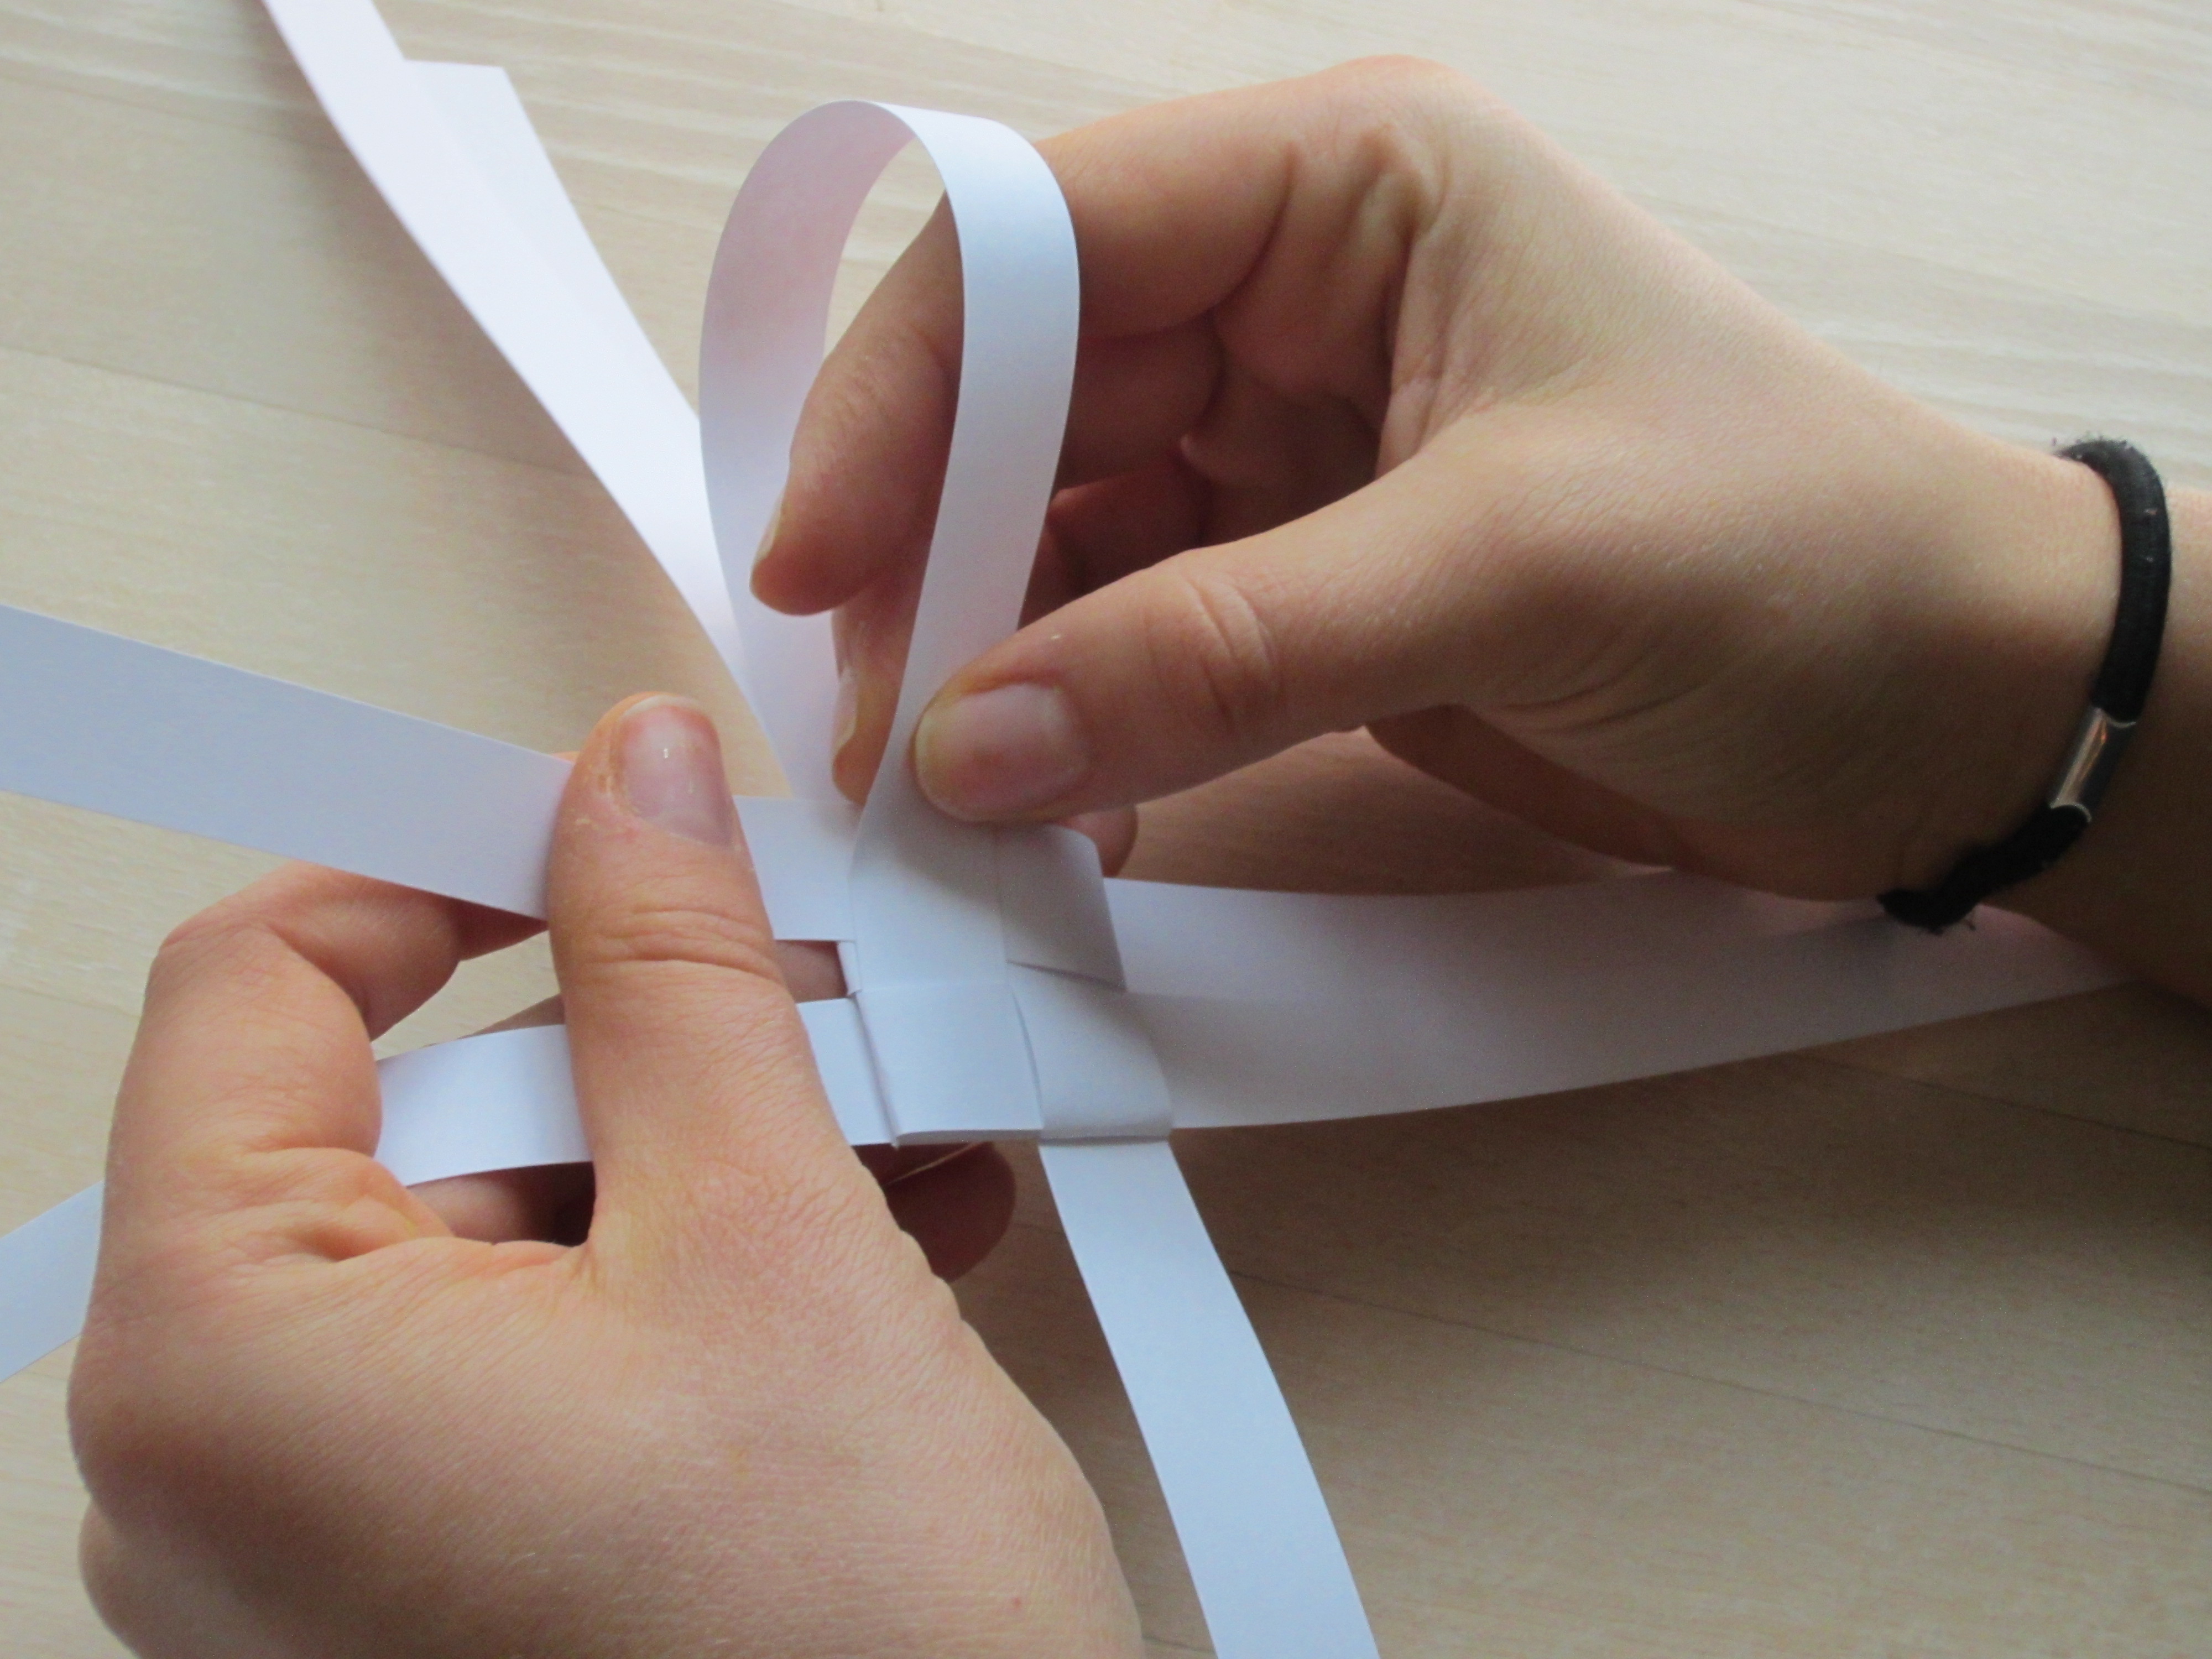
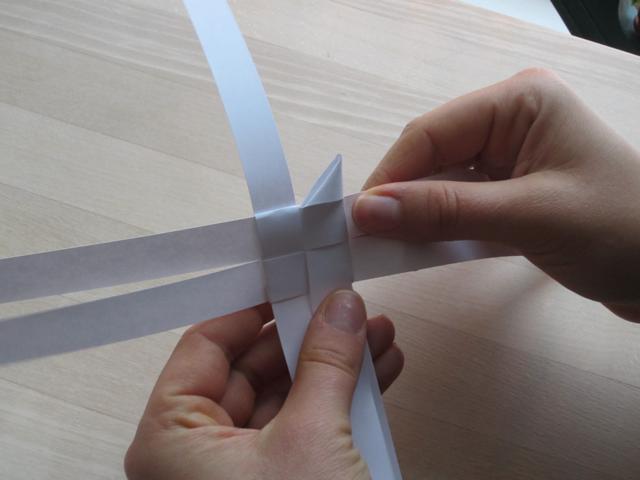
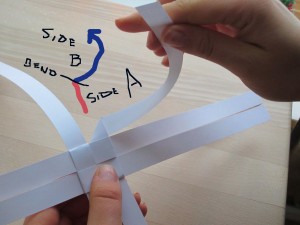
3. Bend the upper half of the first folded strip backwards, so that it lies across the central ”square”.
4. Do the same thing with the remaining three ”upper” strips. The last strip must be pulled through the ”bend” of the first slip in order to lock the other slips. (If you’re actually holding the bits of paper in your hands right now, I hope you see what I mean! 🙂 )

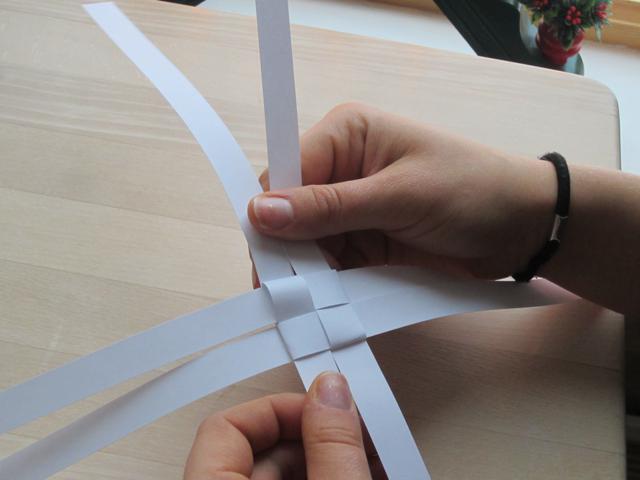
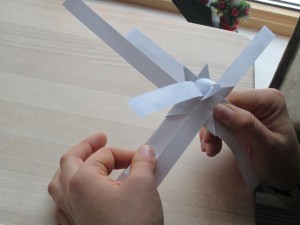
5. The star-in-the-making should now look like this:

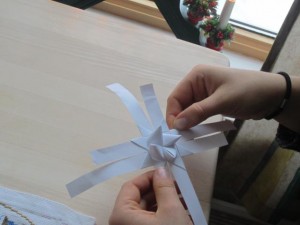
6. Now it’s time to make the points. Each of the eight ends should be bent under itself and away from the centre, so that a triangle appears (press it against the table to make a sharp fold):
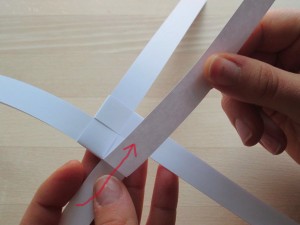
7. Make a loop with the loose end you’re holding, and push it through the ”bridge” just below the triangle you just made. Pull towards you.


8. Repeat the above steps until you’ve got 8 star points. (After the first 4 ones you’ll need to flip the star.)

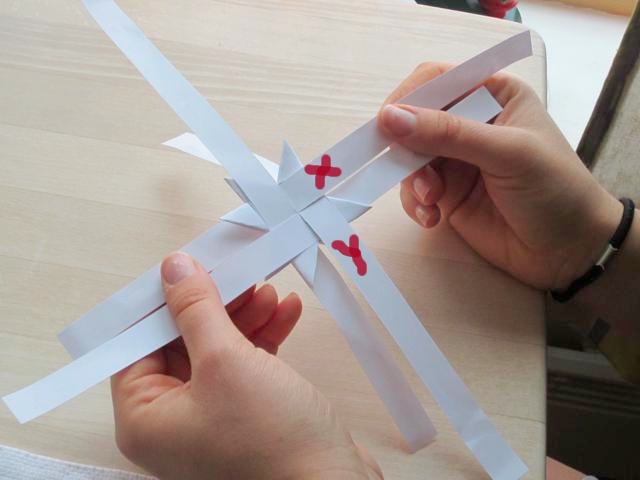
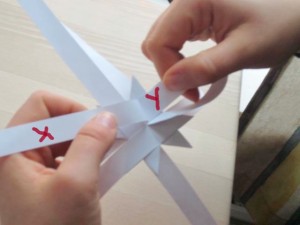
9. The ”surface” points may seem complicated, but if you just fail-and-try, you’ll see it’s actually quite achievable… On the previous photo I marked two slips with an X and a Y. Now lift the X slip and pull it back to give space for the Y slip… Make a counterclockwise loop with the Y slip, and push it through the ”corridor” underneath the lifted X slip… Push it all the way through, until a little ”mountain” is formed. That’s the point! 🙂
10. Repeat step 9 for the other slips, until you’ve got 4 ”mountains” on each side of the star.
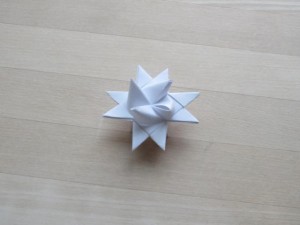
11. Cut the loose ends. The star’s now ready for use! 🙂